
Overview
Unveiling an unprecedented level of detail and nuance, capturing every facet of Sleep Token’s iconic drummer. With an expanded arsenal of articulations, velocity layers, and meticulously curated tones, this library offers an authentic, immersive glimpse into the kit behind the ritual.
Designed to reflect the haunting precision and expressive depth of II, the result is a virtual instrument that transcends genre boundaries. Every element was shaped to serve the emotion behind the performance, delivering a singular tool built to inspire.
Kit Specifications
Kick
Snares
Toms
Hi-Hats
Crashes
Ride
Stacks
Splashes
China
Extras
Snapshots
Below is a list of all the available snapshot presets in the Sleep Token - II library. For a general overview of snapshots, visit the Snapshots Overview .
Default Kit
Default Kit (No Boost)
Default Kit (Unmixed)
All In The Middle
All In The Middle (No Boost)
All In The Middle (Unmixed)
Maple & Walnut Snare
Maple & Walnut Snare (No Boost)
Maple & Walnut Snare (Unmixed)
Steel Snare
Steel Snare (No Boost)
Steel Snare (Unmixed)
A Hair More Rooms
A Hair More Rooms (No Boost)
A Hair More Rooms (Unmixed)
Trashed
Trashed (Unmixed)
Drum Library User Interface
Interface Layout & Basic Usage
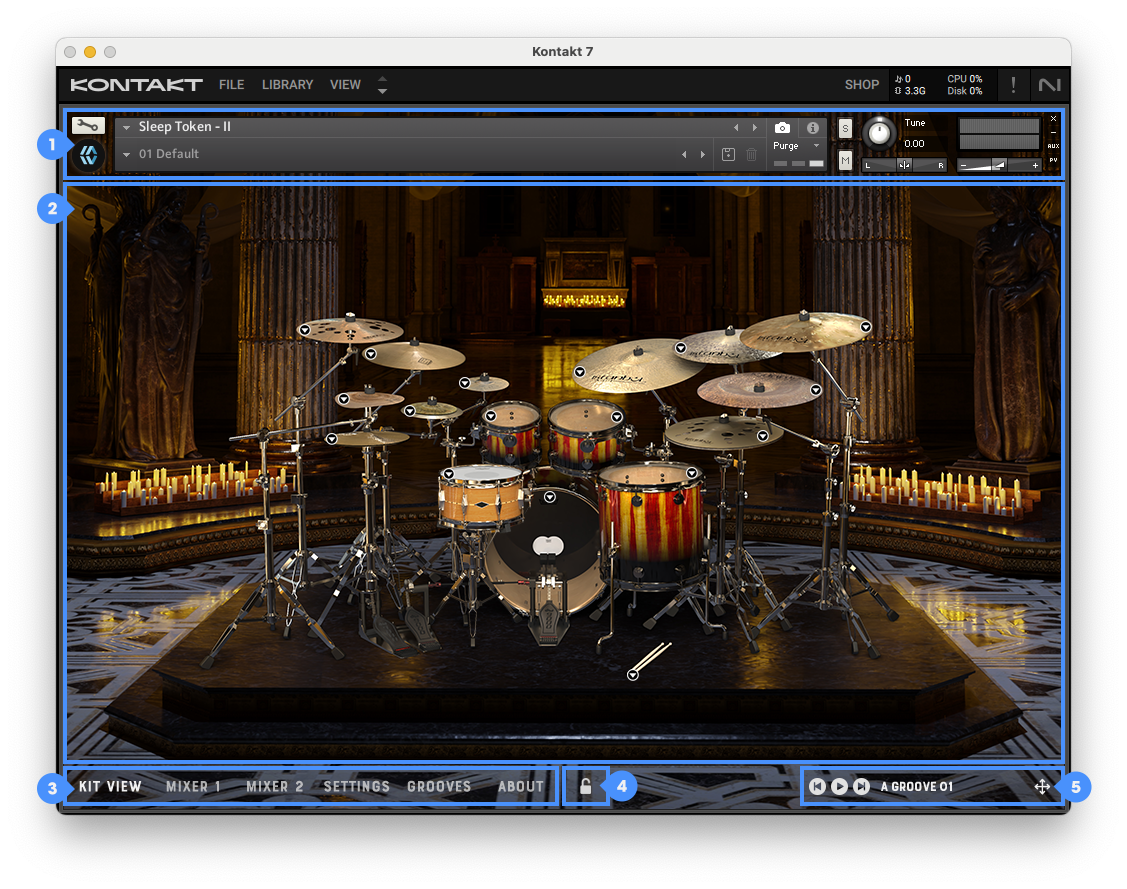
Each MixWave drum library features its own unique visual design. The overall layout and controls remain consistent across all libraries including the following interface elements:
Kontakt Instrument Header
Library Interface
Navigation Bar
Preset Lock
Groove Player Controls
For a full explanation of each section, and general overview of Graphic User Interface (GUI) basics, visit the Drum Library User Interface article.
Kit View
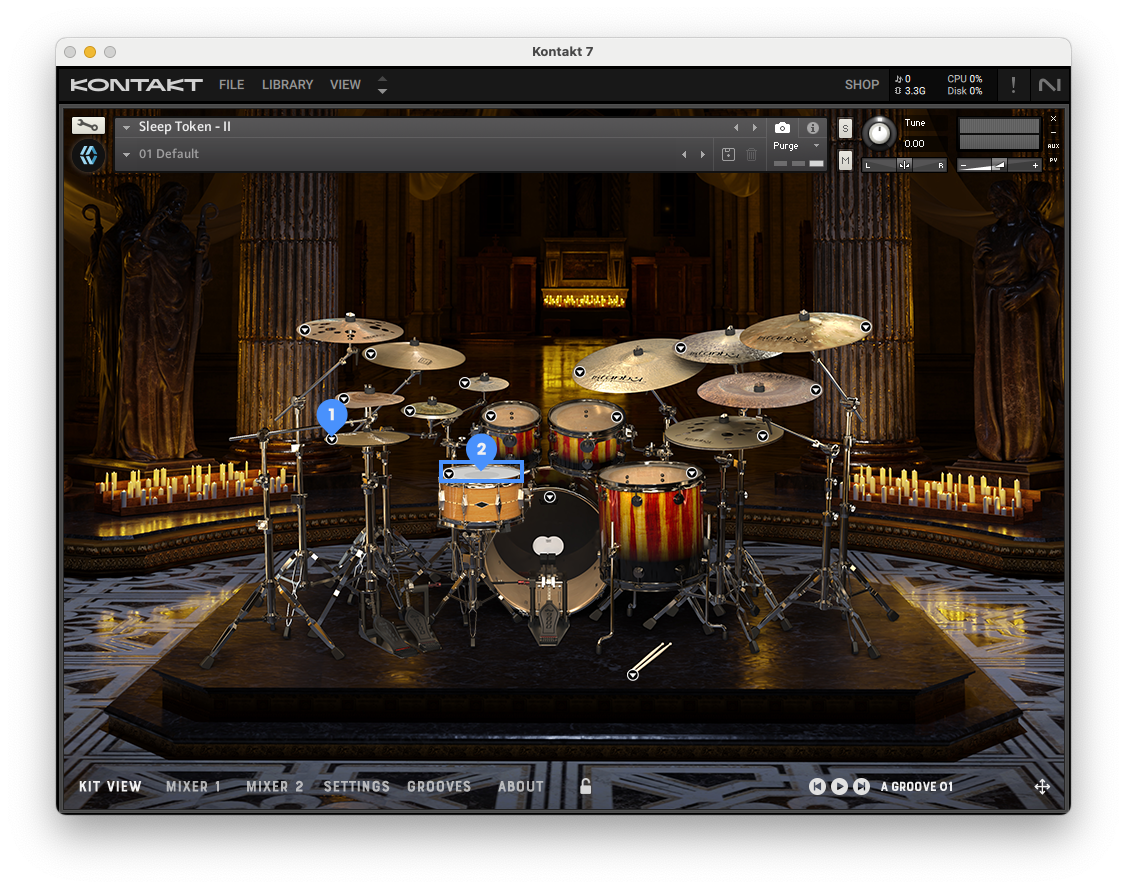
The Kit View provides a visual layout of the drums and cymbals included in the library. From this view, you can audition kit pieces by clicking on them, load or unload individual elements, and swap between available kit piece variations using the following controls:
Drum Menus
Trigger on Click
For more information on the Kit View section controls, view the Kit View article.
Mixer
Mixer Layout
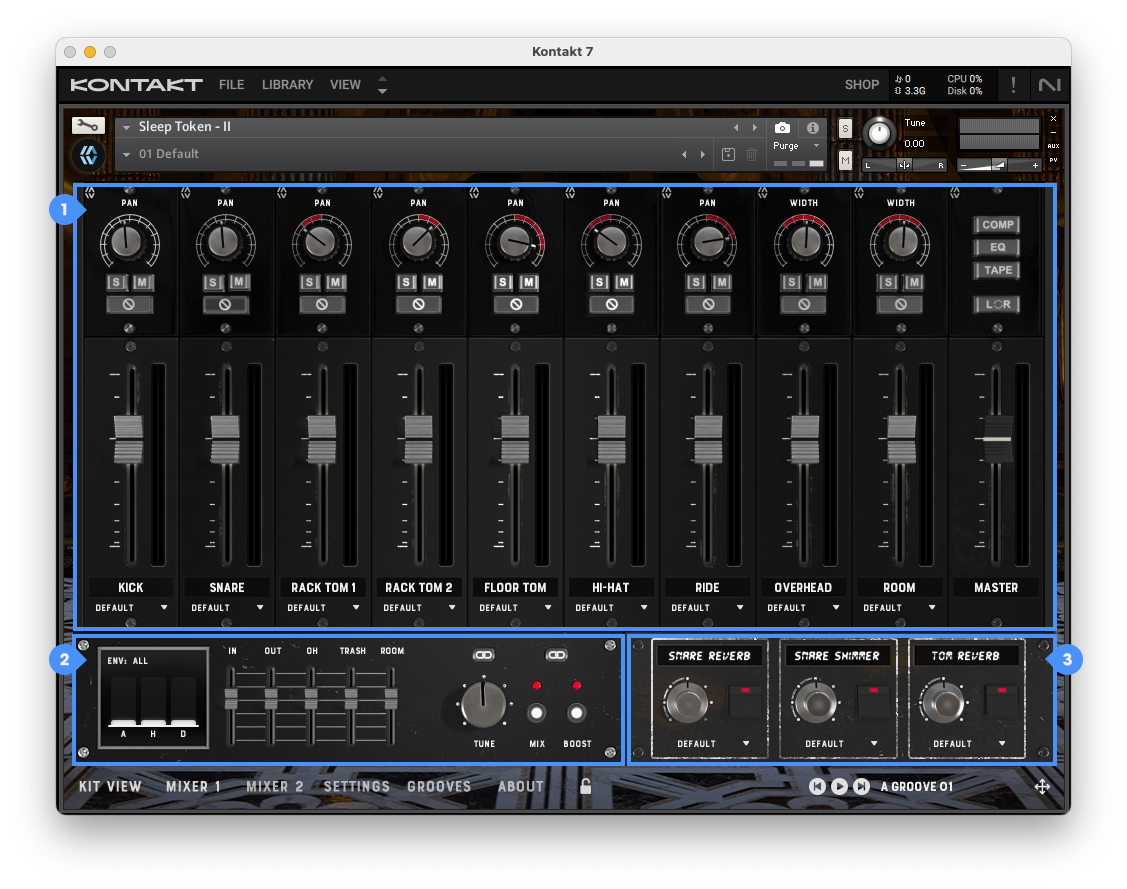
The Mixer section provides control over individual mic channels and multiple output routing. This includes the following sections:
Mixer Channels for volume and panning adjustments.
Mix Panel and Master Panel for sub-mixer controls and master effects.
Reverb Panel for sampled reverbs.
For more information on the Mixer Section, view the General Mixer Interface Overview.
Mixer Channels
The Mixer section in this library includes a set of core controls for each drum and cymbal channel. The image below shows an overview of the Mixer interface with each numbered control labeled for reference:

Pan and Width Labels
Pan and Width Knobs
Solo and Mute Buttons
Phase Buttons
Volume Sliders
Level Meter
Channel Labels
Output Menus
Master Channel Inserts (Comp, EQ & Tape)
Master Left / Right Swap
Master Level Meter
Master Channel Label
To learn more about these features and how each control functions, view the Mixer Channels article.
Main & Sub Mixer Channels
Each main mixer channel controls the overall level of a specific drum, cymbal, or ambient microphone. Under each of these channels, sub channels provide independent control over the bleed captured by different microphone types (e.g., Overhead, Room, Trash). This gives you precise control over the mix, down to individual mic perspectives.
Kick
Controls the main level of the Kick In and Out microphones.
In: Kick In microphone level
Out: Kick Out microphone level
Overhead (OH): Kick bleed in the overhead mics
Trash: Kick bleed in the trash mic channel
Room: Kick bleed in the room mics
Snare
Controls the main level of the Snare Top and Bottom microphones.
Top: Snare Top microphone level
Bottom: Snare Bottom microphone level
Overhead (OH): Snare bleed in the overhead mics
Trash: Snare bleed in the trash mic channel
Room: Snare bleed in the room mics
Rack & Floor Toms
Includes Rack Tom 1, Rack Tom 2, and Floor Tom. Each has its own close mic level control.
Overhead (OH): Tom bleed in the overhead mics
Trash: Tom bleed in the trash mic channel
Room: Tom bleed in the room mics
Cymbals
Includes Hi-Hat, Ride, Splash 1, Splash 2, Mini Stack, Stack, and China. Each has a dedicated close mic channel.
Overhead (OH): Cymbal bleed in the overhead mics
Trash: Cymbal bleed in the trash mic channel
Room: Cymbal bleed in the room mics
Trash, Overhead, & Room Channels
Control the ambient mic levels for the full kit.
Crash 1 (CR1): Volume of Crash 1 in each ambient mic channel
Crash 2 (CR2): Volume of Crash 2 in each ambient mic channel
Crash 3 (CR3): Volume of Crash 3 in each ambient mic channel
Crash 4 (CR4): Volume of Crash 4 in each ambient mic channel
Sticks: Volume of Stick Clicks in each ambient mic channel
Master
Adjusts the final output level of all mic channels and effects within the instrument.
Mix Panel
The Mix Panel, located at the bottom left of the Mixer interface, provides advanced control over shaping each channel’s dynamics, tuning, and the option to toggle between mixed/unmixed samples. The image below highlights each numbered control element:
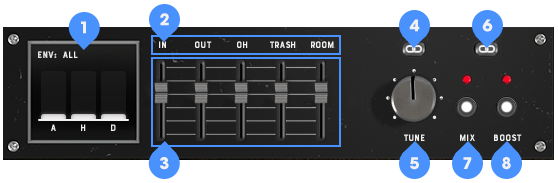
Envelope Controls
Sub Channel Button
Sub Channel Volume
Tune Link Switch
Tune Knob
Mix & Boost Link Switch
Mix Switch
Boost Switch (In this library, it only applies to the Kick and Snare Close and Room channels.)
To learn more about how these features function and when to use them, view the Mix Panel Controls article.
Master Panel
The Master Panel, located at the bottom left of the Mixer interface when the Master Channel is selected, offers additional creative control over your drum mix with onboard compression, EQ, and tape saturation. The image below highlights each numbered control element:
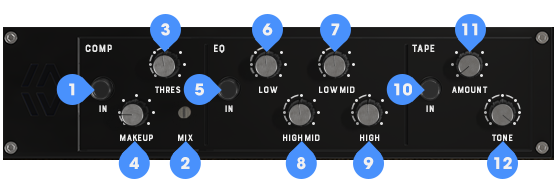
Compressor Bypass Switch
Mix Knob
Threshold Knob
Makeup Knob
EQ Bypass Switch
Low Knob
Low Mid Knob
High Mid Knob
High Knob
Tape Bypass Switch
Amount Knob
Tone Knob
To learn more about these features and how they function, view the Master Panel Controls article.
Reverb Panel
The Reverb Panel, located at the bottom right of Mixer interface, offers control of the sampled reverb levels. The image below highlights each control element:
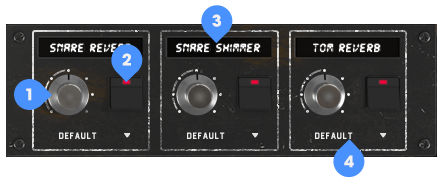
Reverb Volume Knob
Reverb Bypass Switch
Reverb Name
Reverb Multi-Output Menu
To learn more about these features and how they function, view the Reverb Panel Controls article
Settings
Global Controls
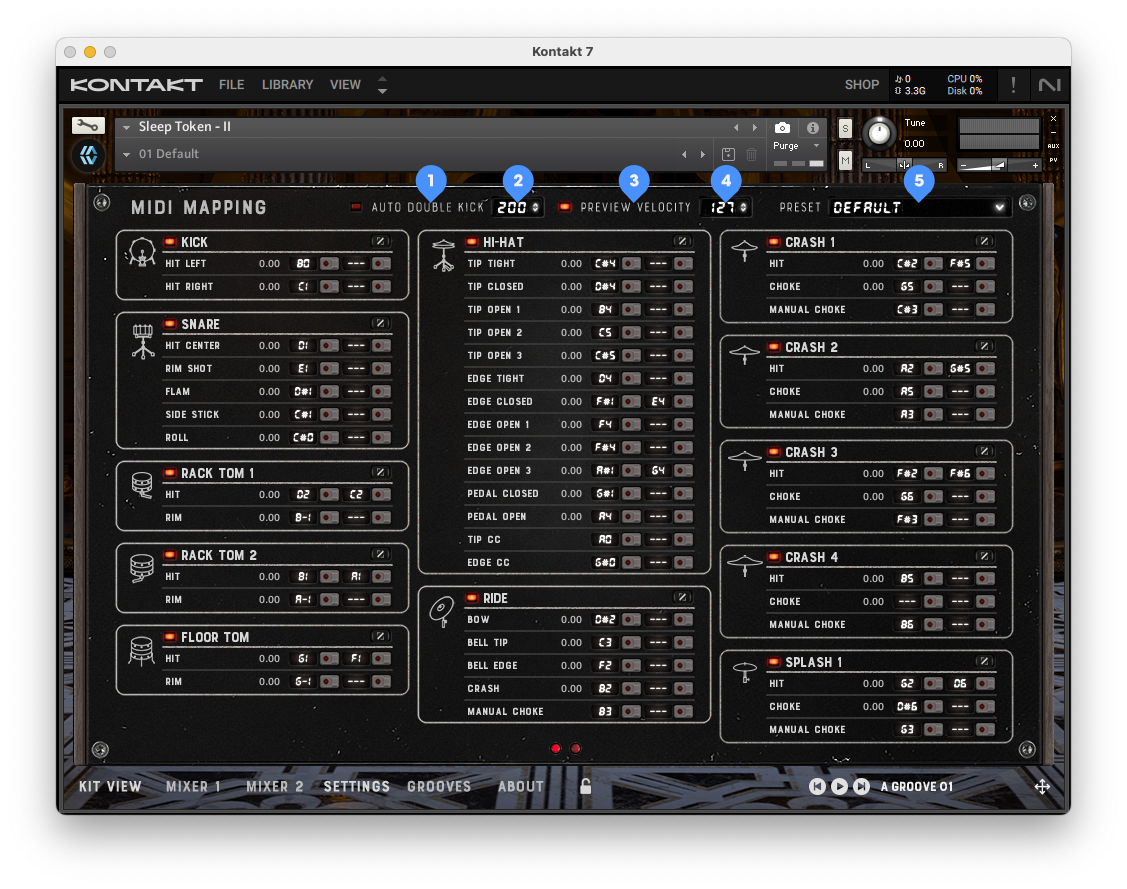
The global controls available in the Settings section are as follows:
Auto Double Kick Switch
Auto Double Kick Threshold
Preview Velocity Switch
Preview Velocity
Mapping Preset Menu
For more information on these controls and their functionalities, view the Settings Global Controls article.
MIDI Mapping

The arrangement of kit pieces in the MIDI Mapping section will vary depending on the library, however the control structure remains the same that includes:
Kit Piece Purge
Primary & Secondary Map Keys
Primary & Secondary MIDI Learn
Articulation Name
Velocity Curve Editor
More detailed information on these controls and their functionalities can be viewed in the MIDI Mapping Section article.
Velocity Curve & Hi-Hat Control
The Velocity Curve and/or MIDI CC pop up is revealed by clicking any Velocity Curve Edit button throughout the main Settings section. Offering more precise control over the incoming dynamics from the source MIDI or MIDI controller per kit piece and extended Hi-Hat CC settings. The image below highlights each control element:
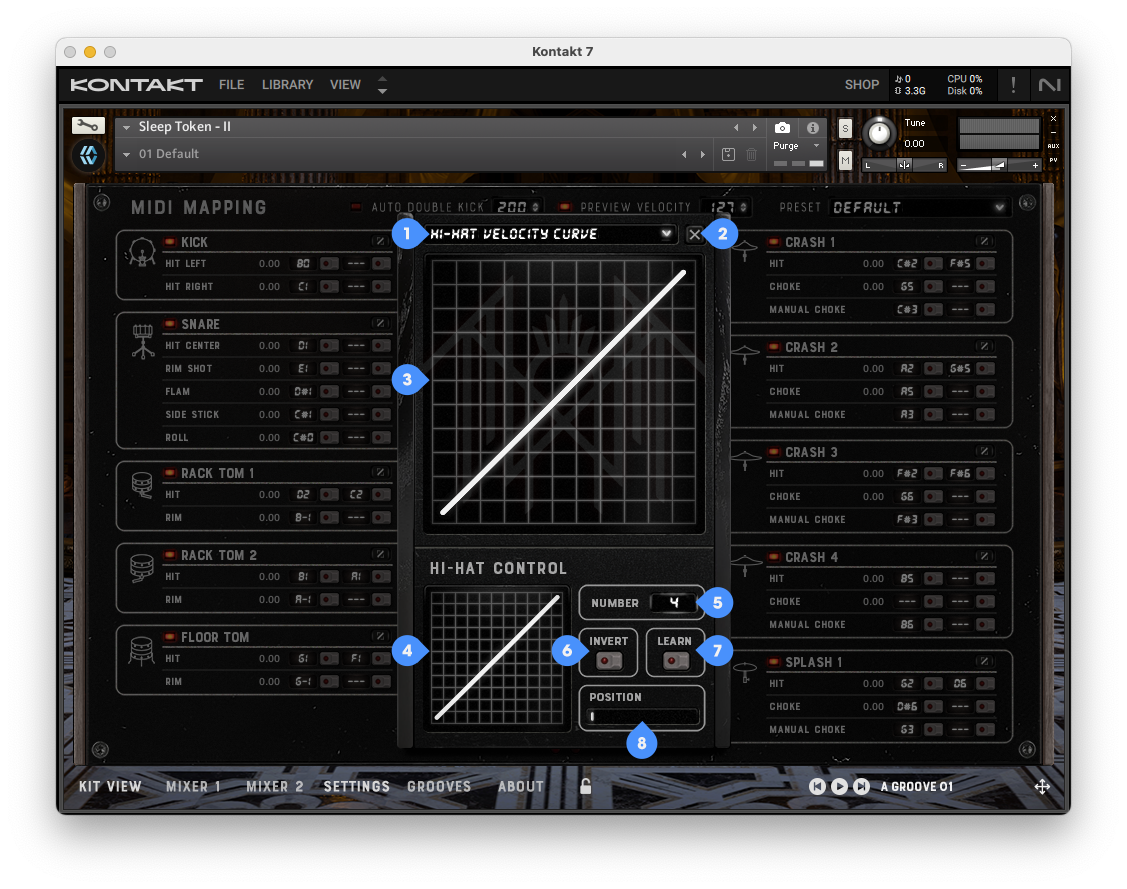
Kit Piece Curve Editor Select
Exit Button
Main Velocity Curve
Hi-Hat Velocity Curve
CC Number
CC Invert Button
CC Learn Button
CC Position
Articulations & MIDI Map Layout
This section includes a complete breakdown of all articulations and their corresponding default MIDI, and native groove pack note assignments. For a more in depth overview of articulations, visit the Drum Library: Articulations Overview.
Kit Piece | Articulation | MIDI Note |
Kick | Hit Left | B0 |
Hit Right | C1 | |
Snare | Hit Center | D1 |
Rim Shot | E1 | |
Flam | D#1 | |
Side Stick | C#1 | |
Roll | C#0 | |
Rack Tom 1 | Hit | D2 / C2 |
Rim | B-1 | |
Rack Tom 2 | Hit | B1 / A1 |
Rim | A-1 | |
Floor Tom | Hit Center | G1 / F1 |
Rim | G-1 | |
Hi-Hat | Tip Tight | C#4 |
Tip Closed | D#4 | |
Tip Open 1 | B4 | |
Tip Open 2 | C5 | |
Tip Open 3 | C#5 | |
Edge Tight | D4 | |
Edge Closed | F#1 / E4 | |
Edge Open 1 | F4 | |
Edge Open 2 | F#4 | |
Edge Open 3 | A#1 / G4 | |
Pedal Closed | G#1 | |
Pedal Open | A4 | |
Tip CC | A0 | |
Edge CC | G#0 | |
Ride | Bow | D#2 |
Bell Tip | C3 | |
Bell Edge | F2 | |
Crash | B2 | |
Manual Choke | B3 | |
Crash 1 | Hit | C#2 / F#5 |
Choke | G5 | |
Manual Choke | C#3 | |
Crash 2 | Hit | A2 / G#5 |
Choke | A5 | |
Manual Choke | A3 | |
Crash 3 | Hit | F#2 / F#6 |
Choke | G6 | |
Manual Choke | F#3 | |
Crash 4 | Hit | B5 |
Choke | — | |
Manual Choke | B6 | |
Splash 1 | Hit | G2 / D6 |
Choke | D#6 | |
Manual Choke | G3 | |
Splash 2 | Hit | G#2 |
Choke | A#5 | |
Manual Choke | G#3 | |
Mini Stack | Tip | C7 |
Edge | C#7 | |
Stack | Tip | D3 |
Edge | D#3 | |
China | Hit | E2 / E6 |
Choke | F6 | |
Manual Choke | E3 | |
Sticks | Hit | G0 |
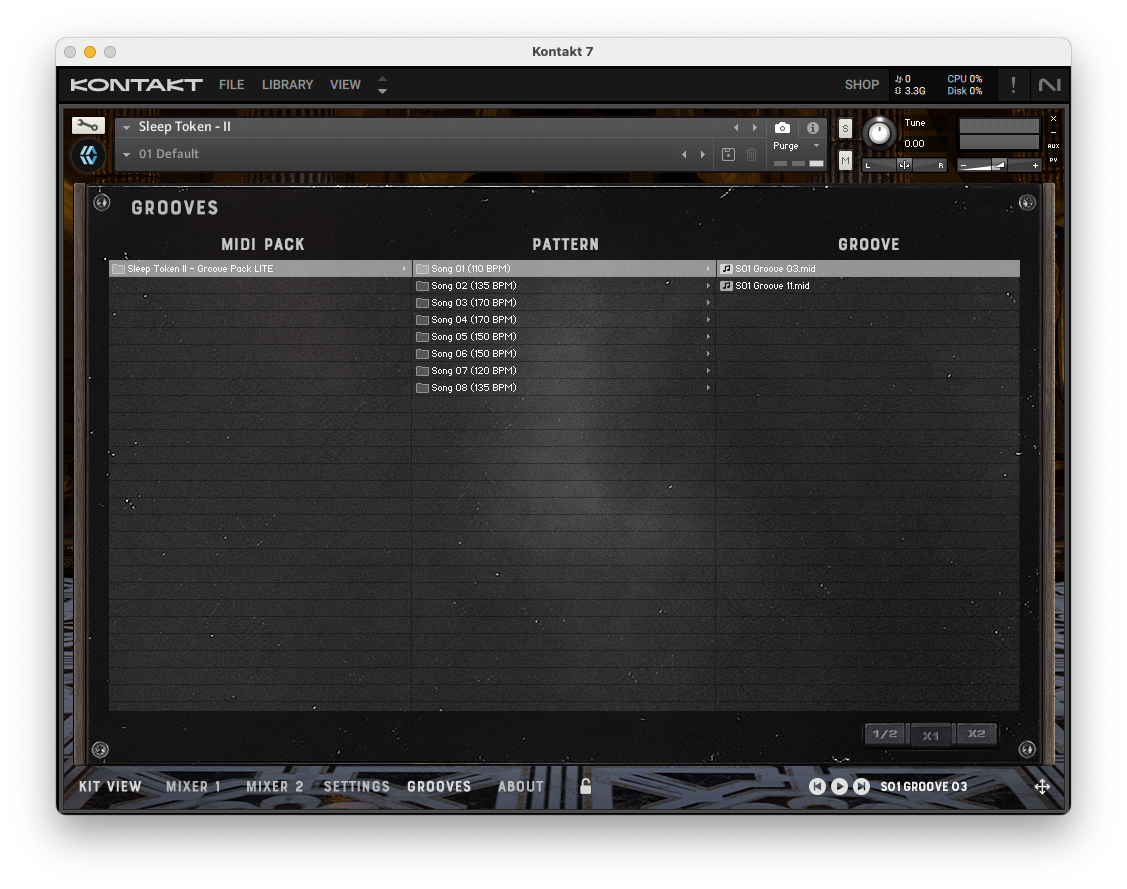
Grooves
This library includes a built-in Grooves and a Groove Player, allowing you to preview and drag MIDI grooves directly into your DAW. Use the Groove Player to audition grooves, switch playback speed, or export patterns with a single click.
For a complete overview of the Groove interface and how to use it, see the Drum Library: Grooves Section article.
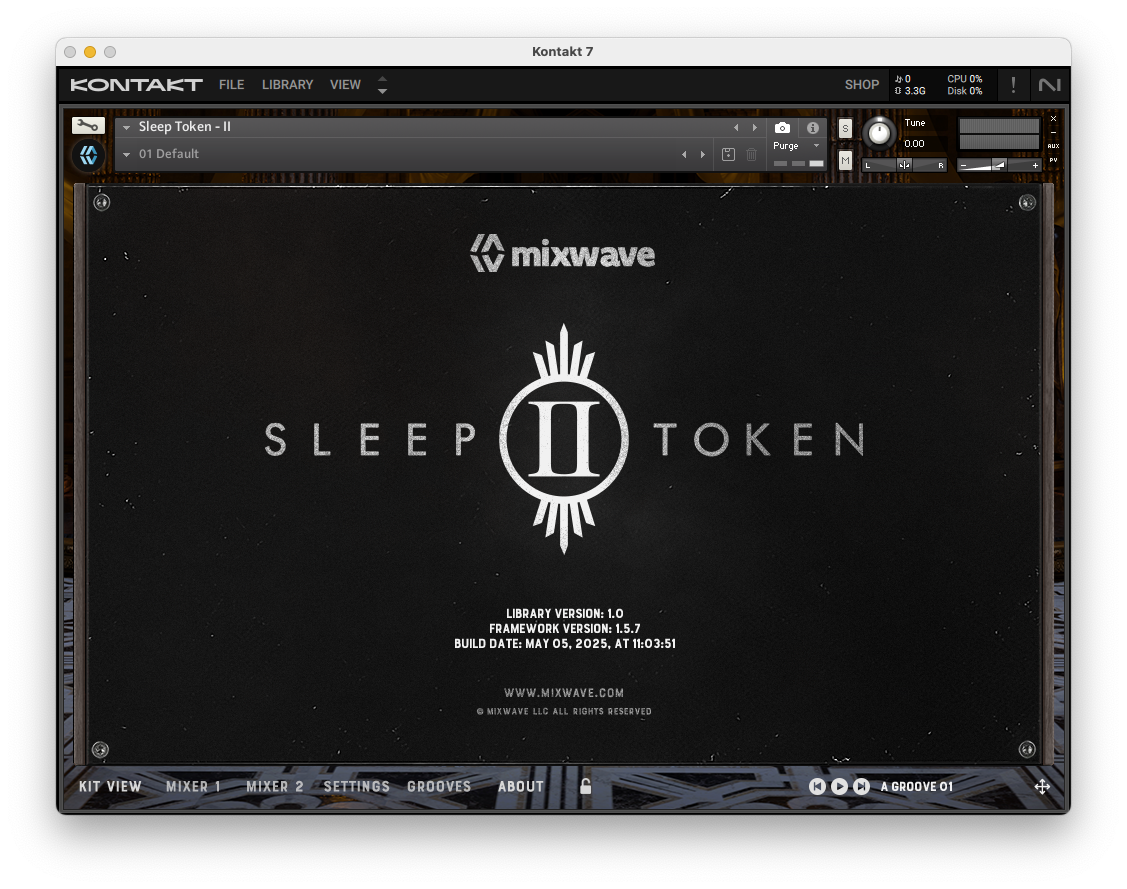
About
Clicking the About button in the bottom navigation of every library interface will show the About Section. This will display the current library version number, library framework version that is installed along with the build date information. It is recommended to double check this page after installing any available update to confirm it was installed correctly.
Disclaimer
Sleep Token and II names/logos/designs are all trademarks belonging to their respective owners and
are used with expressed permission from their respective owners.